Check it out! We finally got rid of our old and falling apart bench! Lets be honest, our last bench was more for looks because we were all afraid to sit on it!
Now our porch is finally a comfortable place to hang out just in time for spring! I followed these plans from Ana White. They were easy to follow and this bench came together really fast. We started building it about 5:00 and were done within a few hours with my husband and I working together.

I will give you a run through on how we did it but Ana White has really good instructions and measurements so be sure to check her tutorial out. First we built the main seat.

Then we added the front and back legs.


This is the one spot I would suggest to divert from Ana’s plans. You are suppose to put the arms on here, but when we went to put the planks on later they were in the way.

We ended up unscrewed them so we could more easily put the bench planks on. Instead I would jump right to attaching the bottom support beam, the back, and the planks and add the arms at the end.

Next put the back on.


To add the planks, first screw in the front plank and the back plank right up against the 2×4’s. Then we measured how much space was left between the boards and then spaced the other two boards evenly.

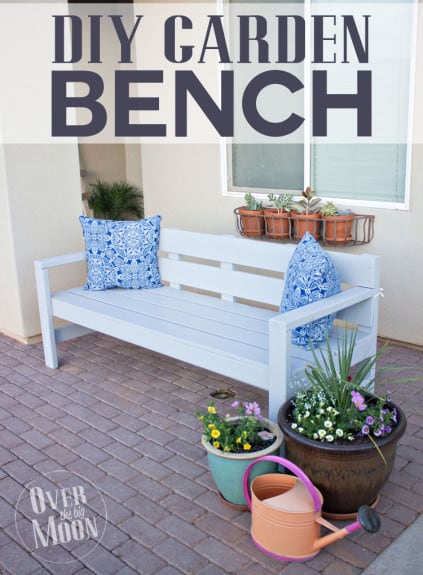
Then it was just time to finish it. I used my hand sander to give it a nice smooth finish and to make sure that the edges were not too sharp. I used the color Sparrow by Behr for my paint. It was a little lighter than I had hoped.


The wind blows pretty hard here in my small town, but I’ve always wanted pillows on my bench. So I decided to find a way to make it work. I cut a long shoestring in half and sewed the middle of the shoelace to the middle of the back an outdoor pillow. Now it is just as simple as tying them onto the bench!

Let the summertime porch parties begin! 
The post DIY Front Porch Bench appeared first on Over The Big Moon.